Tuesday, September 15, 2020

Is it possible to replace the alternator clutch pulley without removing the alternator?

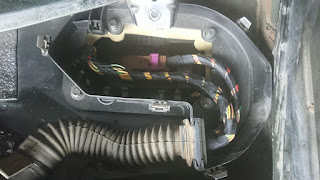
The short answer is - yes it's probably doable. This guide is for doing it on the XC70 2005 with D5 engine. But it is in a tight spot, so you should at least remove the cover around ECM/TCM. The best thing is to also remove the ECM/TCM-computers. You will need a special tool to remove the computers.

To unscrew the pulley you probably also need a special tool set like this:


Then you combine the two needed splined tools in the set:

Remove the alternator belt and the pulley cover. Insert the tool into the pulley. You have to loosen the AC pipe to get access.

Use a big wrench to secure the inner part of the tool, and a small wrench on the outer part of the tool.

Then remove the pulley by turning the small wrench anti-clockwise. You have to use a lot of force. You probably need a very long pipe that you insert around the wrench.

Then you replace the pulley with a new one by doing the same thing in the reverse order.

Tuesday, July 21, 2020

The problem with CEM damaged by water intrusion in 2005/2006-models

All P2 Volvos from the years 2005 and early 2006 were created with a weakness that could allow water to enter the CEM computer inside the car. The CEM is the main computer of the car and its data are encrypted. You cannot switch the CEM from another car and it's very expensive to replace. So, what is the reason for this problem and how to prevent it?

Volvo issued the following service bulletin describing the problem with water ingress:
MODEL: All P2X (S60 S80 V70 XC70 XC90)
YEAR: 2005-2006 (structure week 200425-200540)
CHASSIS:
XC90 FC1 134000-256551

V70 FC1 459000-555060
S60 FC2 425000-522407
S80 FC1 390000-435423
XC70 FC1 173000-220845
V70 FC2 459000-554206
(FC = Factory code) 11TH position of the VIN number


Description:
Various electrical function and communication symptoms may occur in M/Y 2005-2006 vehicles caused by wet corrosion in the CEM (Central Electrical Module) connector. The grommet that seals the harness entrance to the Plenum box may not seal properly if it has been incorrectly assembled.
This may cause a number of different functionality symptoms and DTC's to be set. Examples include but not limited to: Headlight on, even if ignition key is taken out of ignition lock. Warning messages in DIM (Driver's Information Module) display. Warning lamps lit up. Brake lights always on. No start condition.


The cause of the problem


This plenum box has poor quality. It has several weak spots where water can go inside. In addition some of the cars has been incorrectly assembled (butyl seal missing, bad gaskets). A great number of people with these problems reported that the car was parked in a hill during a rainstorm (making the water flow around the plenum box).

However, this problem is not seen on cars before 2005. So what happened? Which change created this problem? Could it be that Volvo replaced the plenum box with another type? No, look at these photos from an early and late model:

2002 Volvo S80

2005 Volvo XC70

They look exactly the same. So this was not the change in 2005. But if we open the plenum box, we find the answer:


2002 Volvo S80 


2005 Volvo XC70

When you look inside the 2002, all you see are some cables and the floor inside the car. But when you look inside the 2005 you see nothing but the CEM computer. In 2005 the CEM was redesigned and moved right up to the opening. So when water enters it has no place else to go than straight into the CEM.

You can even see from the photos that the 2002 plenum box is only secured with 3 bolts, while the 2005 uses 4 bolts. I guess the plenum box was badly designed all along, but the problems did not appear before they redesigned the CEM, making it more prone to water intrusion.


How to prevent this from happening?


The plenum box is so large and is designed in such a way that it is impossible to use butyl sealant around the box. You could remove the box and afterwards seal it to the car. But that will make things quite hard when you later have to remove the box.

Volvo completely redesigned the plenum box and started using the new one in week 40 in 2005. This new box has a much better design and a thicker gasket. Volvo even made an inexpensive conversion kit for the 2005-2006 cars with the old design, and this is the best solution to this potential problem. The conversion kit has the following Volvo part numbers:
Plenum lid: P/N 30728860
Service grommet: P/N 30775689
Plus you also need a couple of plastic strips
This is what the new plenum box and grommet looks like after installing the conversion kit. A much better design for keeping the water out. And the new box is significantly smaller. You can even put butyl sealant around the box if you want to:


The job replacing it is done in a couple of hours. There are 3 cable harnesses. The two connected at the top are easy. But there is also a third harness going down to several connectors in the pedal area. Some of the cable clips can be a bit challenging to reach. But it is certainly doable.

Should I upgrade if I have a 2005 or newer, with the old design?


I would definitely say yes! You could drive for many years with no problem. But one day you are forced to park the car in a hill during a rainstorm, and suddenly the problem appears. These cars are now 15 years old or more. The gaskets could start to fail after so many years. So why take the chance? It is inexpensive to upgrade the plenum box. But if water gets into the CEM, that is very expensive!

Monday, July 13, 2020

How to deactivate (or activate) neutral control

If you have a Volvo with Aisin AW55-50/51 automatic transmission, you may or may not have a function activated named "neutral control" (NC). This function is used for both earlier and later versions of the P2's.

If NC is activated, the transmission will automatically put itself in neutral, when you are holding the foot on the break pedal and the car has stopped. As soon you let go of the break pedal the transmission shifts back to drive.


Why use it?


Maybe some of the intention was for lowering the emissions? If you drive in cities, NC may lower your fuel consumption. If you have a trouble with vibrations when idling, NC may reduce vibrations. It may be that NC is mainly used together with diesel engines, because they generate more vibration.


Why not use it?


NC uses about a small second to engage to drive. If you quickly move your foot from the brake to the accelerator, your may rev up the engine before the transmission is engaged. This would be the same as moving the gearstick from N to D while revving the engine. Not a good feeling, and it will hurt the transmission.

As the transmission solenoids get old and contaminated, shifting between neutral and drive may get slower and more harsh. Normally it may not be a big problem, however if your transmission keeps switching between neutral and drive all the time, this will become very noticeable.

Overall I believe the NC will shorten the lifespan of the transmission. It makes the transmission work more, and every clutch engagement will shorten the lifespan of the clutch plates. Keeping the transmission in drive while the car is stopped will not wear the gearbox. It will only make the car use a bit more fuel.


How can I deactivate the neutral control?


Volvo made a configuration change available for removing NC. It was intentionally made for D5 cars from 2002-2003. However this also works for later models. You don't need a full software upgrade. This is just a small change in the car's configuration. Go to a Volvo dealer and order the following configuration update:

30646691 Neutral Control RE

If you for some reason want to enable the NC you have to order the following configuration update:

30646690 Neutral Control AP


Sunday, July 5, 2020

How to mount an aftermarket subwoofer in your Volvo

If you want to mount a subwoofer in your Volvo, you can try to get hold of an OEM subwoofer that fits perfectly. But it may be very expensive to aquire, and if you do so, you still may have to pay a Volvo technician to activate it in CarConfig. This is how you can mount an aftermarket subwoofer in a 2005:

The spare wheel compartment in the trunk is the ideal place for the subwoofer. Enough space and short distance to the battery. And there is probably already a plug for the OEM subwoofer in the trunk. Locate this plug in the far rear side.


The left and right rear speakers are directly connected to this plug. Use these wires to connect the audio signal to your subwoofer. These wires are high output wires, so you have to use the high input channel on your subwoofer. If you only have low signal input you have to use an adapter.


The +12V and GND you can connect directly to the battery. The subwoofer probably needs a 12V signal wire which is activated when the ignition is on. You can use the signal from fuse number 25. That one is activated only when the ignition is in position II.


You have to build some kind of bracket to hold the subwoofer in place.


Monday, June 29, 2020

How to remove wax from plastic trim

Especially XC70 has a lot of dark plastic trim. It's difficult to wax your car without getting wax on the trim. And the wax is pretty difficult to remove afterwards. The trims are textured, so they lock in the wax. Soap and water does not remove the wax residue. But here is an easy way: Use a white pencil eraser!

Push pin clips in wheel arches

The wheel arches has a one time clip that you have to drill out, if you want to remove the bumper or the plastic arch.

When putting the parts together again, the push pin clips are very useful here. You just have to use an 8 mm drill to make the wholes a bit larger. These clips are cheap on Ebay, and you can use them over and over again.

This is especially useful on later models, where you have to partly disassemble the bumper to get to the right headlight. You have to take out this headlight to change some of the bulbs on the headlight assembly.


The Volvo P2 achilles heel?

The Volvo P2 generation are robust cars that can handle long mileage. One reason is the very good rust protection - galvanized with a thick layer of zinc, protecting plastic trim, and several components in the undercarriage are made out of aluminum, including the whole subframe both in front and rear.

However, the Volvo P2 has one achilles heel, and that is actually rust. The front strut towers may start to rust on the underside, and if untreated it will continue to rust until the rust is visible from the top, under the hood. Then it is rusted through, and very difficult to treat. This may be the end of the car.

Here is a good video explaining the problem:

However, if you inspect the strut towers once a year and remove rust before it grows, you may keep your car for a long, long time.

The inspection can easily be done, but since the rust tend to start on the least visible spot, you have to use a mirror or sit inside the wheel arch to be able to see it.

A rusty strut top mount is used as an explanation of this rust problem. However, I believe there is one additional source to this rust problem. If you inspect the tower you will find a gap where the tower "ends". This small gap will get filled with dirt, water and salt. In time this will make the tower start to rust from the bottom, all along the gap. The rust will spread upwards, meeting the strut mount rust that will spread downwards.

Both earlier and later models are vulnerable to this rust from the tower bottom. Here you can see a photo of where the rust starts:

Here is a photo where the surface rust is removed. You can clearly see that in this case the rust from the bottom gap is a much bigger concern than the rust from the strut top mounts.


After cleaning the gap, I would recommend to fill it with butyl sealing to prevent dirt and water entering the gap.

Saturday, June 20, 2020

Check your alternator brushes

If you have never checked your alternator brushes, it could be a smart thing to do. The brushes wear down, and at a certain point your alternator will stop charging. And that will probably happen in an inconvenient time, at an inconvenient place.

The brushes sits on the regulator, and the regulator is mounted on the alternator. The access is pretty easy. Unscrew some bolts and screws, unplug some connectors, and pull out the regulator. Just remember to disconnect the battery first, or else you may find yourself in big trouble.


A brand new regulator on the left side, and an old regulator with short brushes on the right side. The brushes should be minimum 5 mm.

Earlier and later models have different regulators, so make sure you buy the right one. If you are really into money saving, you could actually try to resolder new brushes on to the regulator. However, these regulators are not expensive. But some of the Volvo/Bosch alternators can be very expensive.

The length of the regulator brushes are never measured at services, so if your alternator is old, you could have a regulator with short time left. Just saying...

Friday, June 19, 2020

How to override shiftlock on AW55-50 when battery is disconnected

Automatic transmissions often has a safety feature named shiftlock, which prevents you from moving the gearstick from Park. When you push the brake pedal the gearstick will be unlocked.

The shiftlock is electronically controlled. So after disconnecting the battery the shiftlock will always be locked and you can't move the gearstick from Park.

This is inconvenient when performing mechanic works on the car, or if you have an electronic failure and have to tow your car.

So how can we override this? This guide will show you how to to it on AW55-50 transmissions.

On earlier models, you simply pull up the cover around the gearstick. Inside you will find a white thingy you can push down to release the lock. You can feel the button as soon as you put your hand inside.

2002 Volvo S80


On later models, it is almost the same thing. You could remove the cover around the gearstick, but it may be easier to remove the side panel on the left side of the gearstick. Down at the bottom you will find a yellow thingy that has to be pushed backwards to release the shiftlock.

2005 Volvo XC70

Thursday, June 18, 2020

Faded Bi-Xenon lamps

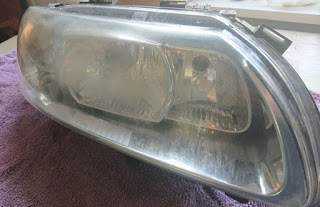
On the later models Volvo changed from glass to plastic headlights. Volvo claims the plastic is stronger against stone chips. But in time the plastic will fade and become cloudy.

The Bi-Xenon plastic headlight lamps are incredibly expensive. They cost about $1500 for a pair. So when my cover lenses had become too faded, I chose the cheaper solution -  to replace the lenses. I have some experience with polishing lenses. It will work, but it does not last long. However, these lenses were not only faded on the outside, but also on the inside. So polishing was not an option.

I only know of one retailer that sell these lenses, and that is Vparts in Sweden: vparts.se
Two new lenses costs about $200.

This is my headlight before I started working:


And this is after:


Wow! What a difference. You don't really comprehend how faded they are until you put on the new lenses. The work involved cutting the plastic and old glue, heating the remaining old glue and pulling out the rest of the pieces.


It's a messy job and takes a couple of hours for each headlight. But it's well worth it. The important thing is to remember using gloves and not touching the chrome. Use compressed air to clean it before you glue on the new lens.

Wednesday, June 17, 2020

Soft subframe bushings?

If you experience improper wheel alignment, clunking or an overall uncomfortable and unsafe condition especially when braking, this could be related to soft or broken subframe bushings.

These bushings are not filled with rubber, but created with a gap on each side to prevent noise and vibrations. However, in time these bushings can get soft with too much play, or the rubber may brake completely.


Replacing those bushings is a huge job, and you have to use a press tool. But if you not wait until they crack, you may save those soft bushings by using inserts. That is a cheap, easy and quick fix. Note that the inserts may cause a bit more vibrations.


If you are mounting these inserts, you may as well replace the subframe bolts. Some of them get pretty rusty because of winter time.


Tuesday, June 16, 2020

Two must-have tools when replacing the rear wheel bearing

Replacing the rear wheel bearing is a pretty straight forward job. To get access to one of the screws to the bearing hub you have to disconnect the shock absorber. Even then you are not able to remove the screw completely - only loosen it so you can remove the hub. The hub itself is pressed in place by the hub bolts, and rust makes it even more stuck. So a slide hammer makes the removal pretty easy.


Of course, you can take a sledge hammer and just hammer away on the hub itself. But I like the feeling of hammering things in the right direction, not to put any extra stress on the other components.

If you have disconnected the shock absorber for a job like this, or for some other reason, you will discover the difficulty in reconnecting the shock absorber. The spring has a lot of tension and is pressing in the opposite direction of the wheel hub.

There is one technique that allows you to reconnect the shock absorber without asking for help from an assistant. This technique is actually mentioned in VIDA. That is by connecting the control arms together with a tension strap, and pull the control arms toward each other. You do it like this:


I suggest you get the strongest tension strap you can find. I used a large 9 metric ton strap, and I had to use some effort to get it to the last "click" where I could reconnect the shock absorber.

If you don't want to have your head between the control arms while doing this, you can use your foot to push the strap handle, and later you can use a long crowbar on the locking mechanism to release it.

Monday, June 15, 2020

Replacing front bushing in rear trailing arm - the hard way or the easy way?

The rear wheel hubs are secured in the forward direction by the trailing arm. The front part of the arm is connected to the subframe by a bushing. The old version of the bushing looks like this:


It's a rubber bushing with gaps on each side to prevent vibrations. However, these bushings tend to get soft in time, with a lot of play. Or the rubber may break completely. This will allow the rear wheels to begin steering, especially on tracked roads or when cornering. The car may start to wander from side to side and you get the feeling that you will lose the control of the vehicle.

Volvo upgraded this bushing. Now, the bushing has no gaps on each side. It is completely filled with rubber. If your bushings are bad, you want to replace them.

The bushing itself is cheap. But to get to the bushing, you have to face the following question: Do you want to to it the hard way, or the easy way?

The common way, the official way according to VIDA, is the hard way. The problem is that the bushing sits in the subframe, not in the trailing arm. The bushing is in a tight spot, so you are not able to access it with conventional pressing tools. Therefore VIDA calls for removing the exhaust system, propeller shaft (on XC70), hoses and pipes connected to the subframe, and to lower the complete subframe.

Wow! My Volvo dealer offered to do the job for $30 in parts and $1000 for labor. If you choose to do it the hard way, you can watch this YouTube clip:

Still reading? Oh, you want to do it the easy way?

The easy way involves no press tools and not lowering the subframe. Instead it involves a different kind of bushing. A 2-part PowerFlex bushing:

This bushing consists of 2 polyurethane parts. You press each part in place, from each side. And then you push in a metal tube that goes through both bushing parts. You need 2 packs to cover both sides.

If you choose the easy way you can do it like this:

Remove the wheel. Disconnect the rear end of the trailing arm. The hub has some tension, so it will jump off. Then disconnect the trailing arm completely. If there is a bracket that prevents you from accessing the front bolt, you have to loosen the bracket.

Use a reciprocating saw to saw out the old bushing. This is the most difficult part. You don't get a straight angle on the saw. You probably are going to scratch up the bushing housing, but hey - it's aluminum...

Clean the housing and grease it up with the grease that comes with the new bushing. Push in the new 2-part bushing, either by hand or with a polygrip or something. Grease up the metal tube and push it inside the bushing.

Connect first the front end of the trailing arm. To manage to connect to rear end you have to use some force. I used a breaker bar to force the hub forward. On this picture I use a screwdriver to demonstrate how I did it:


Insert a flat and wide breaker bar like this and push downwards. After this job is complete you should get a 4 wheel alignment. The final result looks like this:


The bushing is a bit more expensive, and you have to use a reciprocating saw. But this way is WAY more easy!

Sunday, June 14, 2020

Control arm screw

I had to replace the right control arm. One of the screws is in a tight spot. VIDA says you have to unscrew the right engine mounting and lift the engine to reach this screw.

I managed to get a handle on the screw, but only with the handle pointing backwards. I addition the screw was insanely tight. I managed to loosen the screw in an easy way without lifting the engine by using a jack, like on the picture. This may or may not work on your car, depending on which engine you have.


Saturday, June 13, 2020

Headlight wiper renovation

Earlier years have headlight wipers. In time they look ugly like this...


The wiped blades are cheap. But the wiper arms I believe you only get as OEM parts, and they are really expensive. So if you want a good and cheap fix, you could buy a 20 mm heat shrinkable tube and put on. Make a cut for the washer hose, use a cardboard to shield the bumper from the heat gun, and start heating...


Make a cut for the wiper blade, and the final result is this:


Thursday, June 11, 2020

D5? Check your EGR mixer...

If you have an D5 Diesel engine with high mileage, you want to check your EGR mixer. Here you get a buildup of gunk from the air that goes to the engine. Inside the EGR mixer the cold air from the intercooler mixes with the hot air from the EGR. Some say this is the cause of this gunk buildup, and some disable and blank the EGR. Other say that the gunk will just build up anyway. I think this take long time to build up. But after 250 000 kms / 150 000 miles, you could have a lot of gunk.

It's a bit messy, but not a hard job. However I would recommend to disconnect the battery first because it is easy to short circuit the engine starter in that area.


Wednesday, June 10, 2020

How to disconnect and reconnect your battery

Just disconnect and reconnect, right? Nope...

Some claim to have experienced Climate Control Module malfunction after just disconnecting and reconnecting the battery. If you you pay attention, you can notice the sensor fan running behind the small grille in the climate unit. If you close the door and wait for exactly 1 minute, you will hear a relay click and the fan shuts down. I would recommend to wait at least until this fans shuts down before you disconnect the battery.

When I open the driver door on my 2005 XC70, the fan starts again. I advice to close the door, and then wait at least 1 minute. The tailgate door can be open, so you can actually sit in the back and wait for the click sound.

Even so, VIDA states the following:
Warning! The SRS (supplemental restraint system) is active for a certain time after the power is cut. Therefore wait three minutes before starting work. 


When reconnecting the battery, VIDA says you have to put the key in position II before you reconnect the battery. I guess this helps to drain the voltage spikes in a way. This is what VIDA says:

Warning! The key must be in position 2. No one must be in the car when the battery is connected. This is a safety precaution in case an airbag module activates when the power is connected. 


Tuesday, June 9, 2020

Welcome to the Volvo P2 blog

Welcome. This is just a blog about Volvo P2 generation. That is Volvo S80, S60, V70, XC70 and XC90. Normally from the years 2000-2007. Earlier years of P2 will be up to 2004, while later years will be after the facelift that came in 2005.

The posts on this blog is based on my personal experience and research. You may experience that some of this information may not be accurate for your Volvo. Any use of this information is on your own responsibility.